
[HowTo] Order PBXact SaaS Licensing
Now that you have purchased your PBXact Hosting package and your PBXact VPS or Dedicated Server have been provisioned you will need to purchase your PBXact SaaS Licensing from Sangoma. PBXact SaaS (Software as a Service) licenses are needed for each extension. The PBXact SaaS Licenses are purchased via the Sangoma portal.
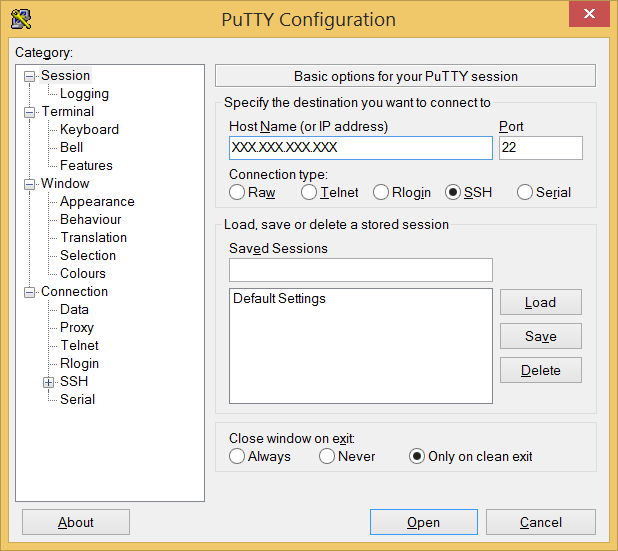
Before you can purchase your PBXact SaaS Licenses you will need to log into your PBXact VPS or Dedicated Server via SSH using a program called PuTTY to get the MAC address of your PBXact server. The server IP address and root password can be found in the email you received from billing@cyberlynk.net when you signed up for your PBXact hosting account. The subject line of the email is ‘[PBXact Hosting] VPS Account Information’.
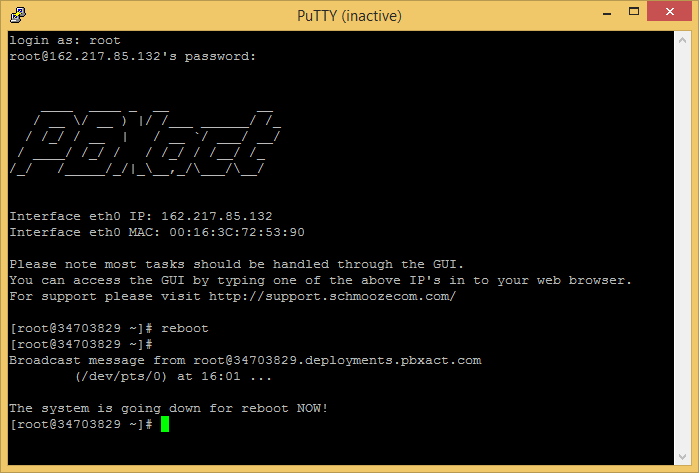
Once you have logged into the PBXact server via SSH using the username of root and the root password the MAC address will be displayed as follows:
Interface eth0 MAC: ##:##:##:##:##:##
Once you have the MAC address of your PBX you can continue with the process of purchasing your PBXact licensing.

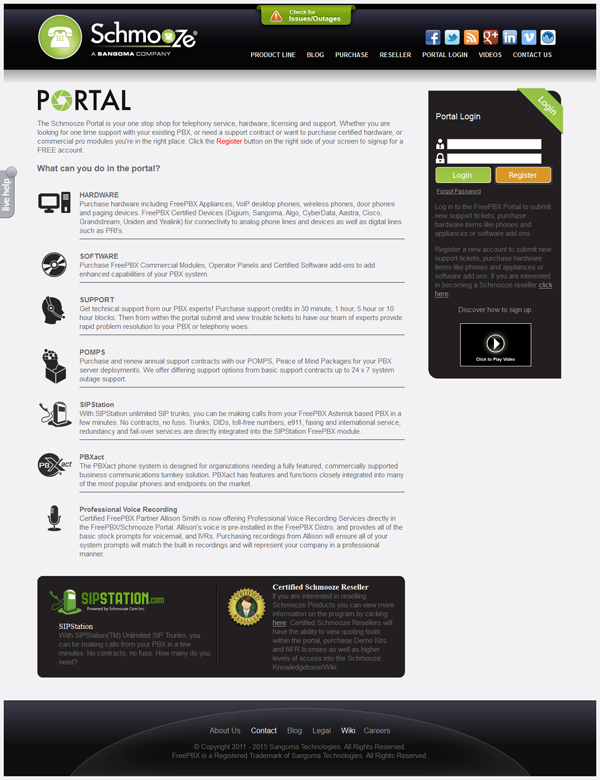
If you already have an account for the Sangoma Portal you can login now. If you need to create an account please click the REGISTER link to create your Sangoma Portal account. This account will be used for PBXact support, licensing and purchasing any IP Phones you might need.


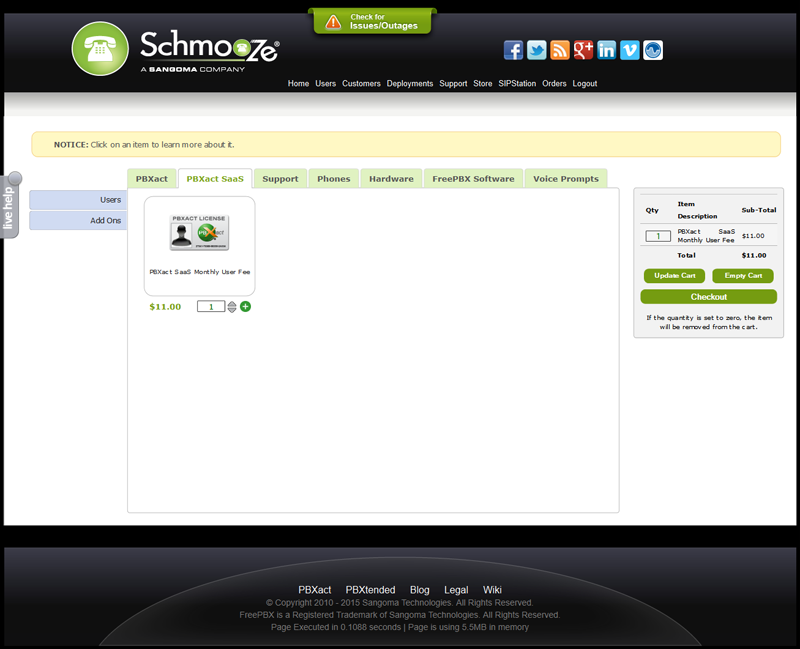
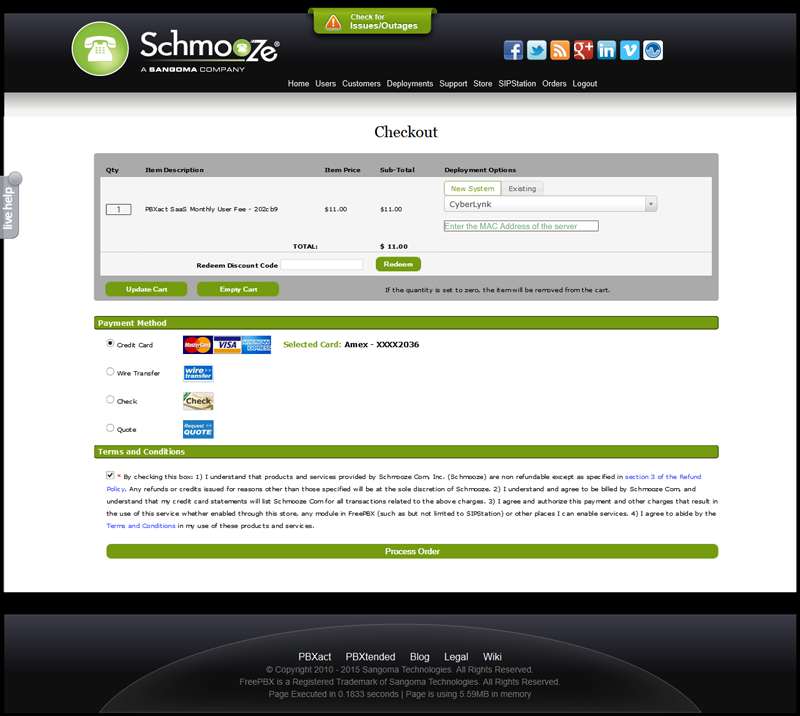
Once you have logged into the Sangoma Portal you will need to click the STORE link and then click the PRODUCTS dropdown and select the PBXact SaaS OEM tab. Select User Licenses and then you can enter the number of PBXact SaaS licenses you would like to purchase. You will need one license for every extension you would like to create within your PBXact Phone System. Click the plus sign icon to add the licensing to your shopping cart. Once you have added the licenses to the shopping cart you will be able to complete the purchase of the licensing. Once you are ready to purchase the licenses simply click the CHECKOUT button on the right hand side.
On the final CHECKOUT page it will ask for your payment information and the MAC address of your PBXact hosting server. You will need to enter the MAC address on this screen so the licensing can be applied to your PBXact server. Once you have entered the MAC address, payment information and checked the box to accept the terms you can click the PROCESS ORDER button.
Once you have purchased your PBXact SaaS licensing, you will need to reboot the server to finish the installation. Log back into your PBXact server via SSH using PuTTY and then you can type the ‘reboot’ command to reboot the PBXact server. The server may take 10-15 minutes to reboot. During this reboot PBXact will finish the installation.
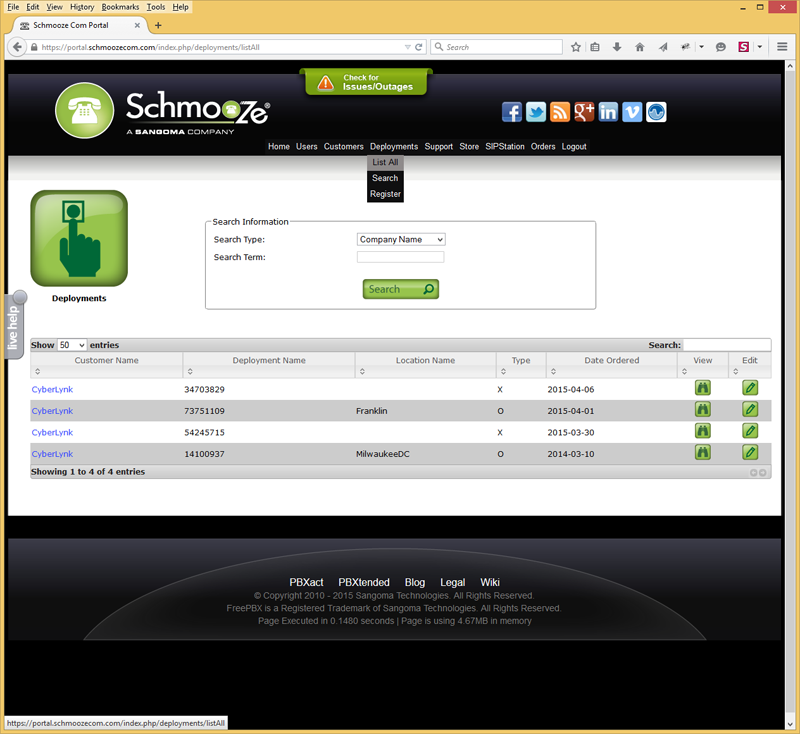
The PBXact installer changes the SSH root password and also generates a username & password for the PBXact web interface. All of this information can be found via the Sangoma portal. Once you are logged into the portal simply hover your mouse over the DEPLOYMENTS menu at the top and click LIST ALL option. The newest PBXact deployment will be listed at the top of the listing. Click the binoculars icon to view the new SSH password and PBXact web interface username & password. The passwords for SSH and the web interface are very long and complex. Please make sure you are copying the whole password. We recommend you keep the passwords complex to avoid being hacked.
By now your PBXact server should be back online and you should be able to access the web interface by entering the IP address into Firefox or Chrome. The PBXact web interface is installed on port 2001 so your PBXact URL will look like: http://IP ADDRESS:2001
Congratulations! You have finished the licensing process. You can now start configuring your PBX to fit your needs.


